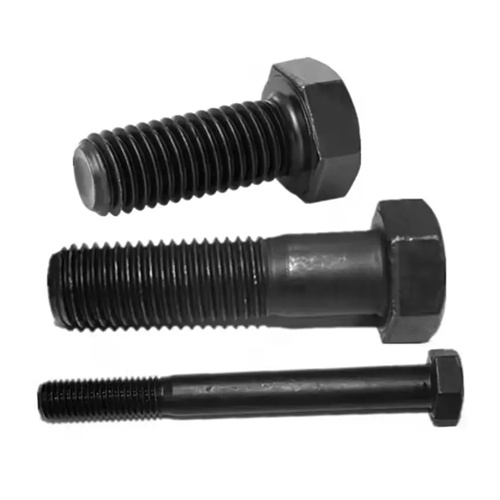
Turning of Trapezoidal Thread Long Lead Screws
Trapezoidal thread long lead screws are core transmission components for machine tool feed systems, precision worktables, and other equipment. Their lengths often exceed 1m (even over 5m) and feature a large aspect ratio (≥20). Turning them presents challenges such as poor rigidity, vibration, and large cumulative pitch errors. Compared to short lead screws, turning long lead screws requires consistent pitch accuracy (cumulative error ≤ 0.1mm/m), profile accuracy (profile angle 30°±10′), and surface quality (Ra ≤ 1.6μm) throughout their entire length. Exceeding any of these parameters can lead to transmission jamming or inaccurate positioning. For example, when machining a 3m long Tr50×6 lead screw, if the cumulative pitch error exceeds 0.3mm, the machine tool table feed error can increase to 0.1mm/1000mm, failing to meet precision machining requirements. Therefore, turning long trapezoidal thread lead screws requires a dedicated plan encompassing clamping method, tool selection, and process routing to balance accuracy and efficiency.
Optimizing the clamping method is key to controlling deformation during long lead screw turning. Due to the low rigidity of long lead screws, traditional double-thrust clamping can cause bending due to their own weight (deflection can reach over 0.5mm). Therefore, a combined clamping method of “one-end clamping + multiple supports” is required: a four-jaw single-action chuck is used at the spindle end to clamp one end of the lead screw (clamping length 100-150mm), while the tailstock is supported by a live center. A steady rest or center rest is placed every 500-800mm. The support blocks are made of wear-resistant cast iron (HB200-220 hardness). The contact pressure with the lead screw outer diameter is adjusted to 0.02-0.03MPa using a dial indicator to avoid surface damage. The steady rest’s position must move in sync with the tool feed direction, always supporting the screw 30-50mm behind the cutting point to offset radial cutting forces. For lead screws longer than 3m, an auxiliary support is added in the center of the machine bed, with the support height adjusted in real time via a hydraulic system to compensate for workpiece bending. After a machine tool factory adopted this clamping method, the curvature of a 3m long lead screw was reduced from 0.3mm to 0.05mm, laying the foundation for subsequent processing.
The rigidity and geometry of the tool system significantly impact the quality of long lead screw turning. Rough turning requires significant stock removal (3-5mm total), requiring high-strength carbide tools (such as YT15) with a shank cross-section ≥20mm x 20mm to reduce vibration. For finish turning, ensuring thread profile accuracy is crucial. High-speed steel tools (such as W18Cr4V) are used, with cutting edges ground to a straightness error of ≤0.01mm/100mm. The thread profile angle is calibrated using a 30° template to an error of ≤±5°. The tool must be installed perpendicular to the lead screw axis, using a square to maintain alignment. A perpendicularity error of ≤0.01mm/100mm is recommended, as failure to do so will result in thread profile asymmetry. To minimize the impact of tool wear on pitch accuracy, a micro-compensation (0.005-0.01mm) is required for every 500mm of thread length. This can be performed automatically by the CNC system. A precision machinery factory customized a high-precision trapezoidal thread turning tool to control the tooth profile angle error of long lead screws within ±3′, and the consistency of thread fit clearance was improved by 40%.
Segmented optimization of cutting parameters must accommodate the varying rigidity of long lead screws. For rough turning, a low speed and high feed combination is employed: a cutting speed of 40-60 m/min, a feed rate equal to the thread pitch, and a decreasing depth of cut (1-1.5 mm for the first cut, decreasing by 0.2-0.3 mm with each subsequent cut) to avoid workpiece bending due to excessive cutting forces. For finish turning, the speed should be increased to reduce surface roughness, but should be kept within 20-40 m/min, with a feed rate of 0.1-0.2 mm/r (normal direction) and a depth of cut of 0.05-0.1 mm. A “multiple pass” process (3-5 times) should be employed to gradually correct for pitch errors. For slender lead screws with aspect ratios greater than 30, a “reverse cutting” method (feeding the tool from the head to the foot of the tool bed) is employed. This utilizes cutting forces to offset bending caused by the workpiece’s own weight and reduce vibration ripple. Experimental data show that when the finishing speed increases from 30m/min to 40m/min, the surface roughness of the long lead screw decreases from Ra1.6μm to Ra0.8μm, but the cumulative pitch error increases by 0.02mm/m, which needs to be weighed according to the accuracy requirements.
Cooling, lubrication, and error compensation technologies are crucial for ensuring the precision of long lead screws. When turning long lead screws, cutting heat causes thermal elongation of the workpiece (a 1°C temperature rise per meter results in 0.011mm elongation). Therefore, a high-flow cooling system (≥50L/min) is required. An emulsion (10% concentration) is sprayed evenly onto the cutting zone and workpiece surface through a circular nozzle to maintain a temperature rise of ≤5°C. Precision long lead screws must be processed in a constant-temperature workshop (20±1°C). Infrared thermometers monitor the workpiece temperature in real time, and feed parameters are adjusted based on the amount of thermal deformation. Cumulative pitch error can be corrected using the CNC system’s error compensation function: Before machining, the machine tool lead screw’s error curve is measured using a laser interferometer, and the compensation value is input into the system. This reduces the lead screw’s pitch error from 0.1mm/m to within 0.05mm/m. Using thermal error compensation technology, an aerospace equipment manufacturer has reduced the cumulative pitch error of a 5m-long precision lead screw to within 0.15mm over its entire length, meeting the requirements of satellite attitude control mechanisms.
Quality inspection and aging treatment are required throughout the entire lead screw machining process. During machining, thread gauges are used to inspect each section (every 500mm). The go gauge must be screwed in smoothly, and the stop gauge must be screwed in ≤2 threads. The thread angle and pitch diameter are measured using a tool microscope, with a pitch diameter error of ≤±0.01mm. A laser interferometer is used to measure the cumulative pitch error over the entire length to ensure compliance with design requirements. After rough turning, stress relief annealing (at 600-650°C for 4 hours) is required to eliminate machining stresses. After finish turning, low-temperature aging (at 120-150°C for 24 hours) is performed to stabilize dimensional accuracy and prevent deformation during use. Final inspection is performed 24 hours after aging treatment, including full-length straightness (≤0.1mm/m), thread surface hardness (HB220-250 for 45 steel after quenching and tempering), and surface roughness (Ra ≤0.8μm). A precision machine tool factory has extended the service life of long lead screws to more than 10 years through strict testing and aging treatment, and controlled the transmission accuracy attenuation rate within 5%.
