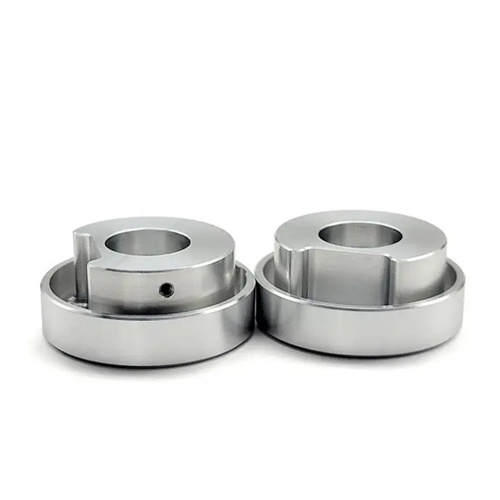
Exchange gear table
Interchangeable gear tables are the core parameter tables used by general-purpose machine tools like lathes and milling machines to achieve thread machining or feed motion. By combining gears with varying tooth counts, they convert spindle speed into tool feed or thread lead according to a specific transmission ratio. Traditional machine tools, lacking CNC systems, rely on interchangeable gear tables to manually configure gear sets. For example, the thread feed system of a CA6140 lathe achieves thread leads ranging from 1 to 192 mm by interchanging the four gears (z1, z2, z3, and z4) within the gearbox. The accuracy of interchangeable gear tables directly impacts machining precision. A survey indicates that thread machining scrap due to incorrect gear combinations accounts for 15%-20% of total scrap. Therefore, understanding the principles behind their compilation, parameter query, and practical application is crucial.
The compilation of an interchangeable gear table is based on the principle of gear ratio calculation and matching the number of gear teeth. The gear ratio i = (z1/z2) × (z3/z4) and must be equal to the ratio of the workpiece lead Pwork to the machine screw lead Pss (i = Pwork / Pss). For example, when machining a 6mm thread with a 12mm machine screw lead, i = 6/12 = 0.5, and the possible choices are z1 = 20, z2 = 40, z3 = 30, and z4 = 30 ((20/40) × (30/30) = 0.5). The number of gear teeth must meet three conditions: the minimum number of teeth must be no less than 17 (to avoid undercutting), the maximum number of teeth must not exceed the space available in the machine gearbox (usually ≤ 120), and the center distances of the two pairs of gears must be equal (z1 + z2 = z3 + z4 or proportional). The gear exchange table is arranged from smallest to largest transmission ratio and is divided into categories such as metric thread, imperial thread, and modular thread. Each lead corresponds to 1-3 recommended gear combinations. Gears with a larger number of teeth are preferred (e.g., 80/100 is better than 40/50) because the manufacturing error of large gears has less impact on the transmission ratio (the error amplification factor is inversely proportional to the number of teeth).
When converting between metric and imperial gear tables, pay attention to unit conversion. Metric threads are measured in millimeters (e.g., M10×1.5, 1.5mm lead), while imperial threads are expressed in threads per inch (e.g., 1/2″-13, lead = 25.4/13 ≈ 1.953mm). When machining imperial threads on a machine equipped with a metric lead screw, conversion to imperial threads requires a gear exchange table. The gear ratio i = (25.4/Pinch)/Pthread, where Pinch is the number of threads per inch. For example, to machine an imperial thread with a 10mm lead on a lathe, i = (25.4/20)/10 ≈ 0.127. The corresponding gear combination can be found in the imperial gear exchange table: z1 = 20, z2 = 100, z3 = 32, and z4 = 50. ((20/100) × (32/50) = 0.128, with an error of 0.78%, which is within the allowable range.) The interchangeable gear tables of some machine tools also include gear combinations for modular threads (lead = π × module) and diametral pitch threads (lead = 25.4 / diametral pitch). Attention should be paid to the impact of the accuracy of the π value (usually 3.1416) on the transmission ratio calculation.
The practical application of interchangeable gear tables requires a balance between accuracy and operational feasibility. When consulting the table, prioritize gear combinations with an error of ≤0.1%. For precision threads (such as lead screws and worms), the error should be controlled within 0.05%. When no directly corresponding gear combination is found in the table, an approximate calculation can be used, but the actual lead must be verified: a 100mm length of thread is turned using a trial cut, the number of teeth within the actual length is measured, and the lead error is calculated (±0.02mm/100mm is allowed). When installing the gears, ensure uniform tooth side clearance (check with a feeler gauge, clearance of 0.01-0.03mm) and that the parallelism error of the gear shafts does not exceed 0.02mm/m to avoid transmission ratio fluctuations due to improper installation. For mass production, gear combination cards can be produced, indicating the number of gear teeth corresponding to the machined part, to reduce table lookup errors during production changeovers. Statistics from a machine tool manufacturer show that the use of standardized gear cards reduced the gear configuration error rate during production changeovers by 60%.
Modern machine tools have a significant trend towards digital upgrades to interchangeable gear tables. Traditional interchangeable gear tables are limited in gear combinations (usually ≤100), making it difficult to meet the needs of complex thread processing. CNC lathes use servo motors and electronic gearbox technology to achieve continuous adjustment of transmission ratios (with an accuracy of 0.0001), eliminating the need for manual gear replacement. However, in the repair of old machine tools or in teaching scenarios, interchangeable gear tables are still core tools. Some manufacturers have developed mobile APP versions of interchangeable gear query systems. After entering the workpiece lead and lead screw parameters, the system automatically recommends the optimal gear combination and calculates the error. In the future, the gear installation guidance system combined with AR technology will further reduce the difficulty of operation, using cameras to identify the number of gear teeth and provide real-time prompts for the installation position and meshing status, thus integrating traditional processes with digital technology.
