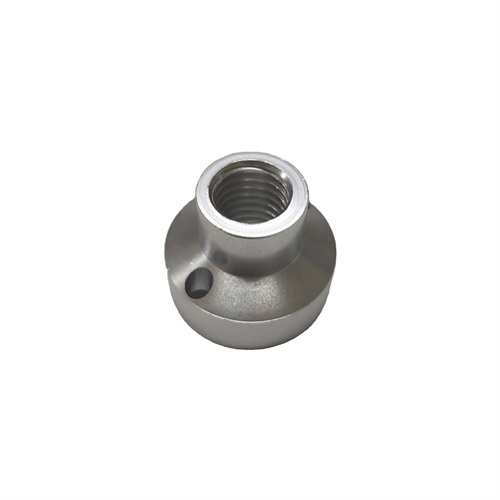
Triangular thread turning tool
Triangular thread turning tools are specialized tools for machining triangular threads (such as conventional threads and Whitworth threads). Their cutting edge shape perfectly matches the thread profile, and machining quality is directly dependent on the tool’s geometric parameters, grinding accuracy, and material selection. Triangular thread turning tools can be divided into external and internal thread turning tools by application, and into high-speed steel, carbide, and ceramic turning tools by material. These tools are suitable for machining different materials (such as steel, cast iron, and non-ferrous metals) and precision requirements (such as coarse and fine threads). For example, when machining an M30×3 standard external thread, a tool with a 60° profile angle is required. Parameters such as the tool tip radius, rake angle, and clearance angle must be strictly designed according to standards. Failure to do so will result in thread profile errors and out-of-tolerance pitch diameters. The design and use of triangular thread turning tools are critical to ensuring thread interchangeability and connection performance.
The geometric parameters of triangular thread turning tools are key factors in determining thread quality. The flank angle (α) must conform to the thread standard: 60° for metric common threads and 55° for imperial Whitworth threads . During sharpening, a dedicated angle template must be used for calibration, with an error within ±10 °. Failure to do so will result in a loose or tight fit. The rake angle ( γ₀ ) should be selected based on the workpiece material: 5°-15° for steel to reduce cutting forces; 0°-5° for cast iron to enhance edge strength; and 10°-20° for non-ferrous metals to prevent tool sticking. The clearance angle (α₀ ) should take into account the influence of the thread lead angle (φ) . The clearance angle in the feed direction should be 6°-8° + φ , and 6°-8° – φ in the run-off direction . Ensure the actual working clearance angle is ≥ 3° . For example, when machining an M20 thread with a 3mm pitch (φ≈2.7°), the feed-direction clearance angle should be approximately 9°. The tool tip radius (rε) must conform to thread standards, typically 0.1443P (where P is the pitch). For example, for a P2mm thread, the tool tip radius is approximately 0.289mm. A larger radius can lead to excessively wide thread roots, while a smaller radius can compromise cutting edge strength. An experiment showed that a 1° error in the thread profile angle can increase the thread pitch diameter by 0.03mm, directly resulting in a go gauge failing to run or a stop gauge failing to stop.
The material selection for triangular thread turning tools must match the workpiece material and processing requirements. High-speed steel turning tools (such as W18Cr4V ) offer a sharp cutting edge and can be ground to a precise tooth profile. They are suitable for machining threads requiring high precision (such as IT6 ) and non-ferrous metals (such as copper and aluminum). Cutting speeds are typically ≤ 100 m/min . Carbide turning tools (such as YT15 and YG8 ) offer excellent wear resistance and are suitable for machining materials such as steel and cast iron. Cutting speeds can reach 100-300 m/min . YT15 is suitable for machining steel, while YG8 is suitable for machining cast iron. Coated carbide turning tools (such as TiAlN -coated) offer 2-3 times the wear resistance of uncoated tools . They are suitable for high-speed cutting and high-volume production, such as assembly line machining of automotive bolts. Ceramic turning tools (such as those based on Al₂O₃ ) are suitable for machining high-hardness materials ( HRC 40 and above), but they are brittle and should be used with caution. When a fastener factory processed 8.8- grade high-strength bolts, it used TiAlN -coated carbide turning tools, which increased the tool life from 500 pieces per blade to 1,500 pieces and tripled the processing efficiency .
The sharpening technique of triangular thread turning tools significantly impacts machining accuracy. Sharpening should be performed on a tool grinder using a diamond grinding wheel (80-120 grit) to ensure a sharp, burr-free cutting edge. The sharpening sequence is to first grind the flank to ensure accurate clearance angle and profile angle; then grind the rake face to control the rake angle; and finally, hone the tip radius to meet the 0.1443P requirement. After sharpening, the profile angle and nose radius should be inspected using a tool microscope, with tolerances of ≤±15° and ±0.01mm, respectively. Precision thread turning tools require relief grinding to create a certain amount of relief on the flank (typically 0.5-1mm) to prevent friction between the flank and the thread flank during machining. After sharpening, the tool should be tested and the fit checked with a thread gauge. If the go gauge appears too loose, the profile angle may be too small, requiring resharpening to increase it. If the stop gauge appears too tight, the pitch diameter may be too large, requiring adjustment of the depth of cut. A precision instrument factory has improved the tooth profile replication accuracy of thread turning tools to 0.01mm by optimizing the grinding process, and the qualified rate of precision threads processed has increased from 85% to 99%.
The use and maintenance of triangular thread turning tools must follow standard procedures. During installation, ensure that the tool tip is at the same height as the center of the workpiece, with a deviation of ≤0.1mm. Otherwise, a half-angle error in the thread profile will occur. The tool axis must be perpendicular (for external threads) or parallel (for internal threads) to the workpiece axis. Calibrate with a square. The perpendicularity error must be ≤0.02mm/100mm. When cutting, select the cutting parameters based on the thread diameter and pitch: for rough turning, the back cutting depth is 0.3-0.5mm, with a feed rate equal to the pitch; for finish turning, the back cutting depth is 0.1-0.2mm, ensuring a surface roughness Ra ≤1.6μm. The choice of cutting fluid must match the material: extreme pressure emulsion for machining steel, kerosene for machining cast iron, and kerosene or diesel for machining non-ferrous metals. Clean chips and oil from the tool promptly after use. Chips and oil stains on the cutting edge must be resharpened if the cutting edge is chipped. Wrap the cutting edge with soft material during storage to prevent damage from collisions. A machine tool factory reduced thread processing tool consumption costs by 30% and equipment downtime by 40% by standardizing the use and maintenance of turning tools.
