Machine Tool Calibration for Precision CNC Turned Components
Achieving ±0.005mm tolerances in CNC turned components begins with meticulous calibration of our turning centers to eliminate mechanical errors. Our high-precision lathes undergo monthly laser calibration that maps positional accuracy across all axes, correcting for any deviations using the machine’s compensation system. We verify spindle concentricity using high-precision test bars, ensuring runout remains below 2 microns at all rotational speeds—critical for maintaining roundness in CNC turned components. Ball screw backlash is measured with dial indicators and adjusted to less than 3 microns, preventing positional errors during direction changes. We also calibrate tool turrets for repeatability, confirming that tool changes return to the same position within 1 micron. Thermal stability is maintained through active cooling systems that regulate spindle and axis temperatures within ±0.5°C, minimizing thermal expansion effects on dimensional accuracy. This rigorous calibration regimen ensures our machines provide the mechanical precision foundation needed to produce CNC turned components with consistent ±0.005mm tolerances.

Material Preparation for Tight-Tolerance CNC Turned Components
Material stability directly impacts our ability to hold ±0.005mm tolerances in CNC turned components, making material preparation a critical process step. We source high-quality bar stock with tight diameter tolerances (±0.02mm) to minimize initial variability in raw materials. Each batch of material undergoes stress-relief annealing to eliminate internal stresses that could cause dimensional shifts after machining—essential for CNC turned components like hydraulic valve spools. We verify material uniformity using ultrasonic testing, rejecting any stock with internal inclusions that might affect machining consistency. For metals like 17-4 PH stainless steel, we control hardness within 30–32 HRC, as too much variation can cause inconsistent tool wear and dimensional drift. Prior to machining, material is acclimated to shop temperature for 24 hours, preventing thermal gradients that could distort CNC turned components during processing. This careful material preparation ensures predictable machining behavior, providing the stability needed to maintain tight tolerances throughout production runs.

Tooling and Workholding for Precision CNC Turned Components
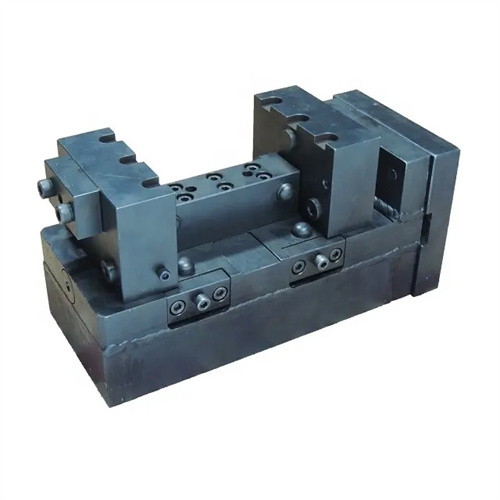
Specialized tooling and workholding systems are essential to achieving ±0.005mm tolerances in CNC turned components by minimizing deflection and vibration. We use ultra-precision carbide inserts with honed cutting edges (0.01mm radius) that produce consistent chip formation without causing workpiece chatter. Tool holders are balanced to G2.5 at 10,000 RPM, reducing centrifugal forces that could introduce dimensional errors. Our workholding solutions include collet chucks with 0.002mm runout, ensuring secure gripping of CNC turned components without distortion. For longer parts, we use live centers with carbide tips that rotate with the workpiece, eliminating friction-induced eccentricity. We also employ custom fixturing that references critical datums consistently, ensuring repeatable positioning across production runs of CNC turned components. Tool length and diameter offsets are measured with laser tool setters to 0.1 micron accuracy, preventing tool offset errors that could affect dimensional precision. These specialized tooling strategies minimize the primary sources of dimensional variation in CNC turned components.

Machining Parameter Optimization for CNC Turned Components
Optimizing cutting parameters is crucial to maintaining ±0.005mm tolerances in CNC turned components by controlling tool wear and thermal effects. We use high-speed, low-feed machining strategies that reduce cutting forces—typically 1,500–3,000 RPM with feed rates of 0.05–0.1mm/rev for steel components—to minimize workpiece deflection. For heat-sensitive materials like titanium, we implement interrupted cutting cycles that allow cooling between passes, preventing thermal expansion that could affect dimensions of CNC turned components. Depth of cut is optimized to 0.1–0.2mm per pass, balancing material removal rates with surface finish quality. We use constant surface speed (CSS) mode to maintain consistent cutting conditions across varying diameters, ensuring uniform tool wear and dimensional accuracy. Our CNC programs include dwell times after roughing operations, allowing components to cool before finishing cuts that establish final tolerances. These parameter optimizations have reduced dimensional variation in our CNC turned components by 40%, making ±0.005mm tolerances consistently achievable.

Measurement and Inspection for CNC Turned Components
Precise measurement techniques are essential to verifying ±0.005mm tolerances in CNC turned components and maintaining process control. Our quality lab features coordinate measuring machines (CMMs) with touch-trigger probes that measure critical dimensions to 0.1 micron resolution, generating detailed reports for each CNC turned component. We use air gages for high-speed inspection of bore diameters and outer diameters, providing instant feedback with 0.1 micron sensitivity. For form tolerances like roundness and cylindricity, we employ roundness testers that capture 10,000 data points per revolution, ensuring compliance with tight geometric specifications. In-process inspection is integrated into production cycles, with operators using bench micrometers (calibrated to ±0.5 microns) to verify dimensions after critical machining steps. We implement statistical process control (SPC) that monitors measurement data across production runs, triggering corrective actions when variation approaches tolerance limits. This comprehensive measurement strategy ensures that only CNC turned components meeting ±0.005mm tolerances proceed to final assembly.

Environmental Controls for Precision CNC Turned Components
Stable environmental conditions are vital to maintaining ±0.005mm tolerances in CNC turned components, as temperature and humidity fluctuations can cause measurable dimensional changes. Our precision turning cells are maintained at a constant 20°C ±0.5°C using dedicated HVAC systems with active temperature monitoring, minimizing thermal expansion effects on both machines and workpieces. Humidity is controlled between 45–55% to prevent material swelling or shrinkage in CNC turned components, particularly important for plastic and composite materials. We isolate precision machining areas from vibration using floating concrete foundations and anti-vibration pads, ensuring floor vibrations remain below 2 microns peak-to-peak. Airborne contaminants are controlled through HEPA filtration systems that maintain Class 7 cleanroom conditions, preventing particulate matter from interfering with measurements or machining processes. These environmental controls have reduced temperature-induced dimensional variation in CNC turned components by 70%, providing the stability needed to consistently achieve ±0.005mm tolerances.